Fashion
How Do You Put Clip in Hair Extensions? A Complete Step-by-Step Guide

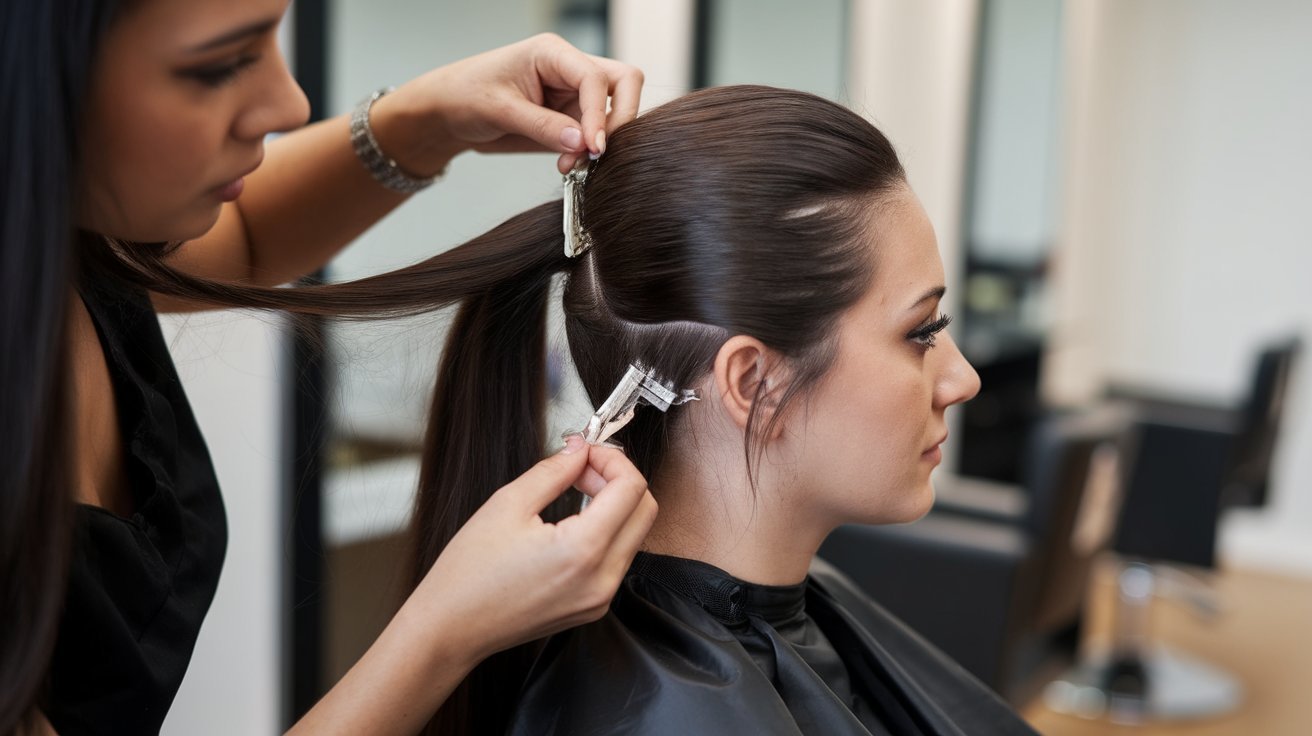
Clip-in hair extensions are one of the simplest ways to add length, volume, and fullness to natural hair without committing to permanent extensions. However, getting a seamless result depends on knowing exactly where each weft should be placed, how the clips should be secured, and how the natural hair should be blended over the extensions.
If we are wondering how do you put clip in hair extensions, the process is straightforward once we understand the correct sectioning technique. We begin with clean, dry hair, create horizontal sections, attach the extension pieces close to the roots, and gradually work upward. With proper placement, the extensions can look natural, feel comfortable, and stay securely in place throughout the day.
How Do You Put Clip in Hair Extensions Step by Step?
Before attaching the extensions, we should prepare both the hair and the clip-in pieces. Hair should generally be clean, completely dry, and free from excessive oils or heavy styling products. Very slippery hair can make clips harder to grip, while tangled hair can make sectioning difficult.
We should gently brush the natural hair from the ends upward until it is completely detangled. Next, arrange the clip-in extensions according to width. Most sets contain several pieces designed for different areas of the head.
The basic process is:
- Brush and detangle the natural hair.
- Separate the hair into horizontal sections.
- Start at the lower back of the head.
- Open the clips on the extension weft.
- Position the weft close to the roots.
- Press the clips firmly into the natural hair.
- Close each clip securely.
- Release the next section of natural hair.
- Repeat the process while moving upward.
- Blend and style the finished hair.
The most important principle is to avoid attaching every piece too close to the scalp. Leaving a small amount of natural hair between the scalp and the clip helps create a comfortable and secure attachment.
How to Section Hair Before Putting in Clip-In Extensions
Proper sectioning is the foundation of successful clip-in extension application. We should use a tail comb or similar sectioning tool to create clean horizontal lines.
Starting at the nape of the neck, we can lift the hair and create a horizontal section approximately one to two inches above the bottom hairline. The remaining hair should be clipped out of the way.
The narrowest extension pieces are often useful near the lower sections because they provide additional fullness without creating unnecessary bulk. Once the first weft is attached, we release another section of natural hair and move slightly higher.
As we work toward the crown, the extension pieces generally become wider. This arrangement helps distribute the added hair evenly across the head.
We should also leave enough natural hair around the sides and top to cover the extensions completely. Clip-in extensions should not be visible when the hair is parted or moved naturally.
How to Attach the Clips Securely to Natural Hair
Once a section has been created, we hold the extension underneath the sectioned hair with the clips facing toward the scalp. The clips should be opened before positioning the weft.
Starting with the middle clip, we gently press it into the natural hair close to the roots and snap it closed. We then secure the clips on either side.
For particularly fine or silky hair, we can gently backcomb a small amount of hair at the roots before attaching the extension. This creates additional texture for the clips to grip. We should keep this teasing minimal because excessive backcombing can cause unnecessary tangling.
The extension should feel secure but not painfully tight. If a clip pulls, pinches, or creates noticeable tension, we should remove it and reposition it slightly lower or farther away from the scalp.
For wider wefts, checking both ends after securing the center is important. The entire piece should sit flat against the head rather than bowing outward.
Where Should We Put Each Clip-In Extension?
Placement depends on the design of the extension set, but a general pattern works well for most clip-in systems.
The smallest pieces can be placed around the lower sides and nape. Medium-width pieces work well across the middle sections, while the widest wefts can be placed toward the upper back of the head.
We should avoid placing extensions directly on the crown or immediately beside the hairline. These areas usually need sufficient natural hair coverage to hide the attachment points.
Around the temples, smaller pieces can provide extra fullness, but we should maintain a safe distance from the edges of the hairline. The goal is to distribute the added hair rather than concentrate too much weight in one area.
When several wefts are installed, we should check the head from different angles. Balanced placement creates a more natural shape and prevents the extensions from appearing bulky.
How Do You Blend Clip-In Hair Extensions With Natural Hair?
After all the pieces are attached, blending is what transforms separate extension wefts into a cohesive hairstyle.
We should first release the natural hair that was clipped away during installation. A gentle brush can then be used to combine the natural hair with the extensions. We should brush carefully, beginning at the ends and working upward.
If the extension color closely matches the natural hair, blending is usually easy. However, differences in texture can still make the attachment noticeable. Light styling can help integrate both types of hair.
For example, we can create soft waves throughout the natural hair and extensions together. Curling or waving the combined hair can make differences in length and texture much less obvious.
For straight hairstyles, a flat iron may help create a consistent appearance, provided the extensions are made from heat-resistant human hair or another material specifically designed for heat styling. We should always follow the manufacturer’s temperature and care instructions.
Common Mistakes When Putting in Clip-In Hair Extensions
One of the most common mistakes is attaching the extensions too close to the scalp. Although clips need to sit near the roots, positioning them directly against the scalp can cause discomfort and unnecessary tension.
Another mistake is using too many pieces. More extension hair does not automatically produce a better result. Excessive weight can make the hairstyle uncomfortable and may make the extensions easier to detect.
Poor sectioning is another frequent problem. Uneven sections can cause gaps, visible clips, or an unbalanced appearance. Taking a little extra time to create clean horizontal sections usually produces a significantly better result.
We should also avoid brushing aggressively over the attachment points. Extensions require gentle handling, particularly when removing tangles.
Finally, we should never sleep with clip-in extensions unless the manufacturer specifically states that they are suitable for overnight wear. Removing them before sleeping can reduce pulling, tangling, and unnecessary stress on the natural hair.
How to Remove and Care for Clip-In Hair Extensions
Removing clip-in extensions is generally just as important as installing them correctly. We should start with the upper pieces and work downward, or follow the arrangement used during application.
Each clip should be opened carefully rather than pulled directly out of the hair. Once a weft has been released, we can place it on a clean surface and gently detangle it.
Clip-in extensions should be stored clean, dry, and protected from unnecessary friction. Keeping the pieces organized by size can also make the next application much faster.
If the extensions require washing, we should follow their specific care instructions. Human-hair extensions may have different requirements from synthetic pieces, and excessive washing can shorten their useful life.
Regular gentle brushing, appropriate storage, and careful handling can help maintain the appearance of the extensions for considerably longer.
Final Tips for Natural-Looking Clip-In Extensions
Learning how do you put clip in hair extensions becomes much easier with practice. The key is not simply attaching the clips but creating a placement system that works with the natural shape and density of the hair.
We should always begin with clean, detangled hair, use clean horizontal sections, place the extensions at appropriate heights, and secure every clip without creating excessive tension. After installation, blending the natural hair with the extensions is essential for achieving a polished appearance.
The best results usually come from balanced placement rather than maximum volume. When the extension pieces match the natural hair in color, texture, and general length, the finished hairstyle can appear remarkably seamless.
With careful installation and proper maintenance, clip-in extensions provide a flexible way to change a hairstyle for everyday wear, special occasions, photographs, or events while allowing us to remove them whenever desired.
Frequently Asked Questions
Can we put clip-in extensions into short hair?
Yes. Clip-in extensions can be used with shorter hair when there is enough natural hair to provide secure attachment and adequate coverage. Smaller pieces may be easier to blend than very wide wefts.
How close to the scalp should clip-in extensions be?
They should be positioned close enough to the roots for secure attachment but not directly against the scalp. A comfortable placement helps prevent pulling and makes the extensions easier to conceal.
Why do my clip-in extensions keep slipping?
Slipping can occur when the natural hair is very smooth, oily, or too thin for the clips to grip effectively. Creating clean sections and adding a small amount of root texture can improve stability.
Can we curl hair with clip-in extensions installed?
This depends on the extension material. Human-hair extensions can generally be styled with suitable heat tools, while synthetic extensions may be damaged by heat unless they are specifically labeled heat-resistant.
Should clip-in extensions be removed before sleeping?
In most cases, yes. Removing them before sleeping helps reduce tangling, pulling, friction, and unnecessary stress on both the extensions and natural hair.

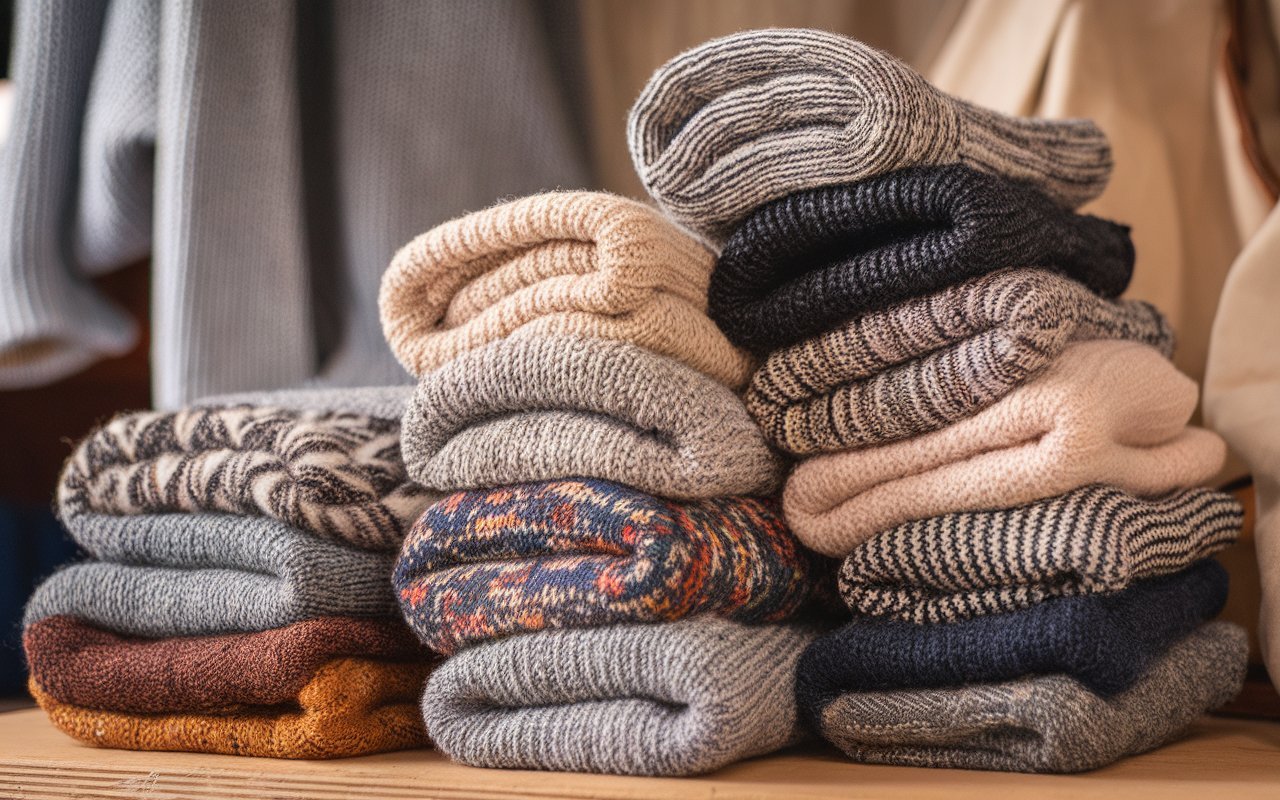
If you have recently encountered the word Wollmatten, you may be wondering what it means and why it appears in connection with flooring, insulation, yoga, gardening, and other applications. The answer is relatively simple: Wollmatten is a German term generally meaning “wool mats.” The singular form is commonly written as Wollmatte, while Wollmatten refers to multiple wool mats. The term itself does not identify one specific brand, product, size, or manufacturing method. Instead, it describes a broad category of mats made completely or partly from wool.
This distinction is important because a Wollmatte designed as a comfortable indoor floor covering can be completely different from a dense wool product designed for insulation. Other examples include felted mats, yoga and meditation surfaces, garden protection mats, furniture pads, acoustic materials, and specialized technical products. In 2026, understanding the intended application is therefore more useful than relying on the word alone.
What Does Wollmatten Mean?
The simplest translation of Wollmatten is wool mats. The German word Wolle means wool, while Matte means mat and Matten is the plural form. Consequently, the word describes an object and its principal material rather than a particular commercial product. Current explanations of the term consistently emphasize that Wollmatten can represent different products depending on context.
Most products associated with Wollmatten use sheep’s wool, although the exact composition varies. Some may contain nearly pure wool, while others can incorporate synthetic fibers, backing materials, adhesives, dyes, or protective treatments. Manufacturing methods can also differ. Wool can be felted, woven, tufted, compressed, or needle-punched, producing mats with very different textures, densities, strengths, and performance characteristics.
For this reason, we should not assume that every product described as a Wollmatte has the same properties. A soft decorative mat and a rigid insulation mat may share wool as their main material while serving completely different purposes.
What Are Wollmatten Made From?
The most common raw material associated with Wollmatten is sheep’s wool. Wool is a natural protein fiber, and its characteristic structure gives it properties that make it useful for textile and technical applications. The naturally crimped fibers can create air spaces within the material, contributing to warmth, cushioning, and insulation.
However, the phrase “wool mat” does not automatically mean 100% wool. A finished mat may include a separate backing, reinforcement fibers, adhesives, dyes, coatings, or other materials. This is particularly important for consumers looking for natural, renewable, or biodegradable products. The environmental and functional characteristics of a finished mat depend on its entire construction rather than wool alone.
The manufacturing technique is equally important. Felted wool mats can provide a dense and stable surface, while woven or tufted products may have a softer textile appearance. Needle-punched wool materials can be manufactured for more specialized applications. Before purchasing, we should therefore examine the complete material specification instead of relying only on the product name.
Common Types and Uses of Wollmatten
One reason Wollmatten attracts so many different search results is the wide variety of products that can fall under the general description. Indoor wool mats are often used as floor coverings, where wool can provide warmth, softness, cushioning, texture, and visual appeal. Such mats can work particularly well in bedrooms, living spaces, offices, reading areas, or other places where comfort underfoot is important.
Another application is yoga and meditation. Some wool mats are designed for slower practices such as meditation, Yin Yoga, and restorative exercises, where warmth and cushioning can be more important than the high-friction surface associated with many conventional fitness mats. However, a wool meditation mat should not automatically be assumed to provide the same grip or performance characteristics as a purpose-built exercise mat.
Wool also appears in gardening products. Certain sheep-wool mats can be wrapped around plant containers to provide winter protection. This illustrates why context matters: a garden Wollmatte may look nothing like a decorative floor mat, even though both are described using the same general term.
Perhaps the most technical application is insulation. Specially manufactured sheep-wool products can be supplied as mats, felts, or loose-fill materials for building applications. These products are designed according to technical requirements and should not be confused with ordinary decorative wool rugs or floor mats.
Benefits of Wollmatten
The potential benefits of Wollmatten depend heavily on the specific construction and intended use, but several characteristics of wool explain its popularity.
First, wool can provide natural warmth and insulation. Its fiber structure helps trap air, making wool useful where thermal comfort is desired. This can make wool-based floor coverings feel comfortable in colder environments.
Second, wool offers cushioning and resilience. Depending on density and construction, a wool mat can provide a softer surface than hard flooring while maintaining its structure under normal use.
Third, wool has useful moisture-interaction properties. Wool can absorb and release moisture vapor, although this should not be confused with waterproofing. A wool mat can therefore interact with humidity differently from many fully synthetic materials, but prolonged exposure to liquid water can still damage some products.
Wool-based materials can also contribute to sound absorption, which explains their use in certain interior and acoustic applications. Again, the actual acoustic performance depends on thickness, density, installation, and the complete product design rather than simply the presence of wool.
Wollmatten for Insulation, Interiors, and Sustainable Materials
The growing interest in natural materials has increased attention toward wool-based insulation and interior products. Wool is a renewable natural fiber, and untreated wool can biodegrade under suitable conditions. However, we should avoid assuming that every Wollmatte is automatically environmentally friendly.
The complete environmental profile can depend on animal husbandry, processing, transportation, energy consumption, dyes, chemical treatments, synthetic components, backing materials, product lifespan, and disposal. A pure wool mat and a wool-synthetic composite should not automatically receive identical environmental assessments.
For building insulation, technical specifications are especially important. A proper insulation product should be selected according to factors such as thermal performance, density, thickness, moisture behavior, fire classification, dimensional stability, and installation requirements. A decorative wool mat should never be substituted for a certified construction insulation product simply because both contain wool.
This distinction allows us to appreciate the advantages of wool while keeping product claims realistic.
How to Choose the Right Wollmatten
Choosing the right Wollmatten begins with identifying the purpose. If the goal is a floor covering, we should consider dimensions, thickness, softness, durability, backing, cleaning requirements, and expected foot traffic. For meditation or yoga, cushioning, surface comfort, portability, and grip become more relevant.
For gardening, the material should be appropriate for outdoor conditions and the intended level of cold protection. For insulation, the product must meet the relevant technical and building requirements rather than simply being described as a wool mat.
We should also check the fiber composition. If 100% wool is important, the product specification should explicitly confirm it. If a mat contains synthetic fibers, backing, adhesives, or coatings, those materials may affect durability, cleaning, recyclability, biodegradability, and overall performance.
Finally, care instructions should always be followed. Wool products may require gentle cleaning and protection from excessive moisture, heat, or aggressive chemicals. Correct maintenance can significantly influence how long a Wollmatte remains useful.
Frequently Asked Questions About Wollmatten
What does Wollmatten mean?
Wollmatten means “wool mats” in German. It is a general term rather than the name of one particular brand or standardized product. The exact type depends on the context.
What is the singular form of Wollmatten?
The singular form is generally Wollmatte, meaning a wool mat. Wollmatten is the plural form.
Are Wollmatten made from 100% wool?
Not necessarily. Some products are made from pure wool, while others can contain synthetic fibers, backing materials, adhesives, dyes, or protective treatments. Checking the complete product specification is essential.
Can Wollmatten be used as insulation?
Yes, purpose-made wool insulation mats can be used in suitable building applications. However, an ordinary decorative wool mat should not automatically be treated as construction insulation.
Are Wollmatten waterproof?
No. Wool can interact with moisture vapor, but that does not make a wool mat waterproof. Product-specific care and moisture instructions should always be followed.
Are Wollmatten environmentally friendly?
Wool is a renewable natural fiber, and untreated wool can biodegrade under appropriate conditions. However, the environmental impact of a finished Wollmatte depends on its complete material composition, production, transportation, useful life, and disposal.
Conclusion
Wollmatten is a straightforward German term that generally means wool mats, but its practical meaning can vary significantly according to context. A Wollmatte may be a decorative floor covering, a soft meditation surface, a garden protection product, a felted pad, or a specially engineered insulation material.
The main advantage of wool is its combination of warmth, cushioning, resilience, moisture interaction, and natural-fiber characteristics. Nevertheless, these properties should not be generalized to every product carrying the Wollmatten label. Material composition, density, construction, backing, thickness, and intended application all influence performance.
For anyone researching Wollmatten in 2026, the best approach is simple: identify the purpose first, then examine the specifications. By doing so, we can distinguish an attractive wool floor mat from a yoga surface, garden mat, or technical insulation product and choose the material that actually fits the intended application.


 Food2 months ago
Best Empanada Tucumana Near Me: The Ultimate 2026 Guide to Finding Authentic Argentine Empanadas
- News3 months ago
Marcy Wudarski: Everything You Need to Know About James Gandolfini’s First Wife
- celebrity3 months ago
Matewa Kiritapu: Everything You Need to Know
- celebrity3 months ago
Brent Power: A Complete Guide to Understanding Its Meaning, Importance, and Modern Applications
- celebrity3 months ago
Marie-France Ward: A Complete Biography, Career, Life Story, and Legacy
- Tech2 months ago
Almawadahit.com Tech: The Complete 2026 Guide to Technology News, Digital Trends, Reviews, and Online Resources
- Food2 months ago
Best Tarta de Pollo Near Me: The Ultimate 2026 Guide to Finding Authentic Chicken Pie
- celebrity2 months ago
Viva Street Croydon: The Complete 2026 Guide to Buying, Selling, Jobs, and Local Deals